
Create an Order Manually
A complete worked example: enter an order by hand, process it, and read the report.
This walks through the whole journey once, using a demonstration order. By the end you will have created a lab order by hand, recorded a detected pathogen and a resistance gene, generated a report, and opened the resulting PDF.
The example uses this order:
| Field | Value |
|---|---|
| Order identifier | test0003 |
| MRN | test0003 |
| Patient name | Test Patient |
| Birth date | 01/01/1991 |
| Sex | Female |
| Test panel | Test Panel |
| Priority | Normal |
| Pathogen detected | Escherichia coli |
| AMR gene detected | blaCTX-M-14 |
These are example values. Use test or de-identified data for training unless your organisation has approved the environment for protected health information.
Before you begin
Have to hand the order identifier, the patient demographics, the test panel name, the detected pathogens, and any detected resistance genes. Check the spelling of pathogen and gene names against the source result before you start — they are printed on the report.
1. Open Order History
Select Orders in the sidebar — the clipboard icon directly below Home. The Order History page opens.
2. Start a new order
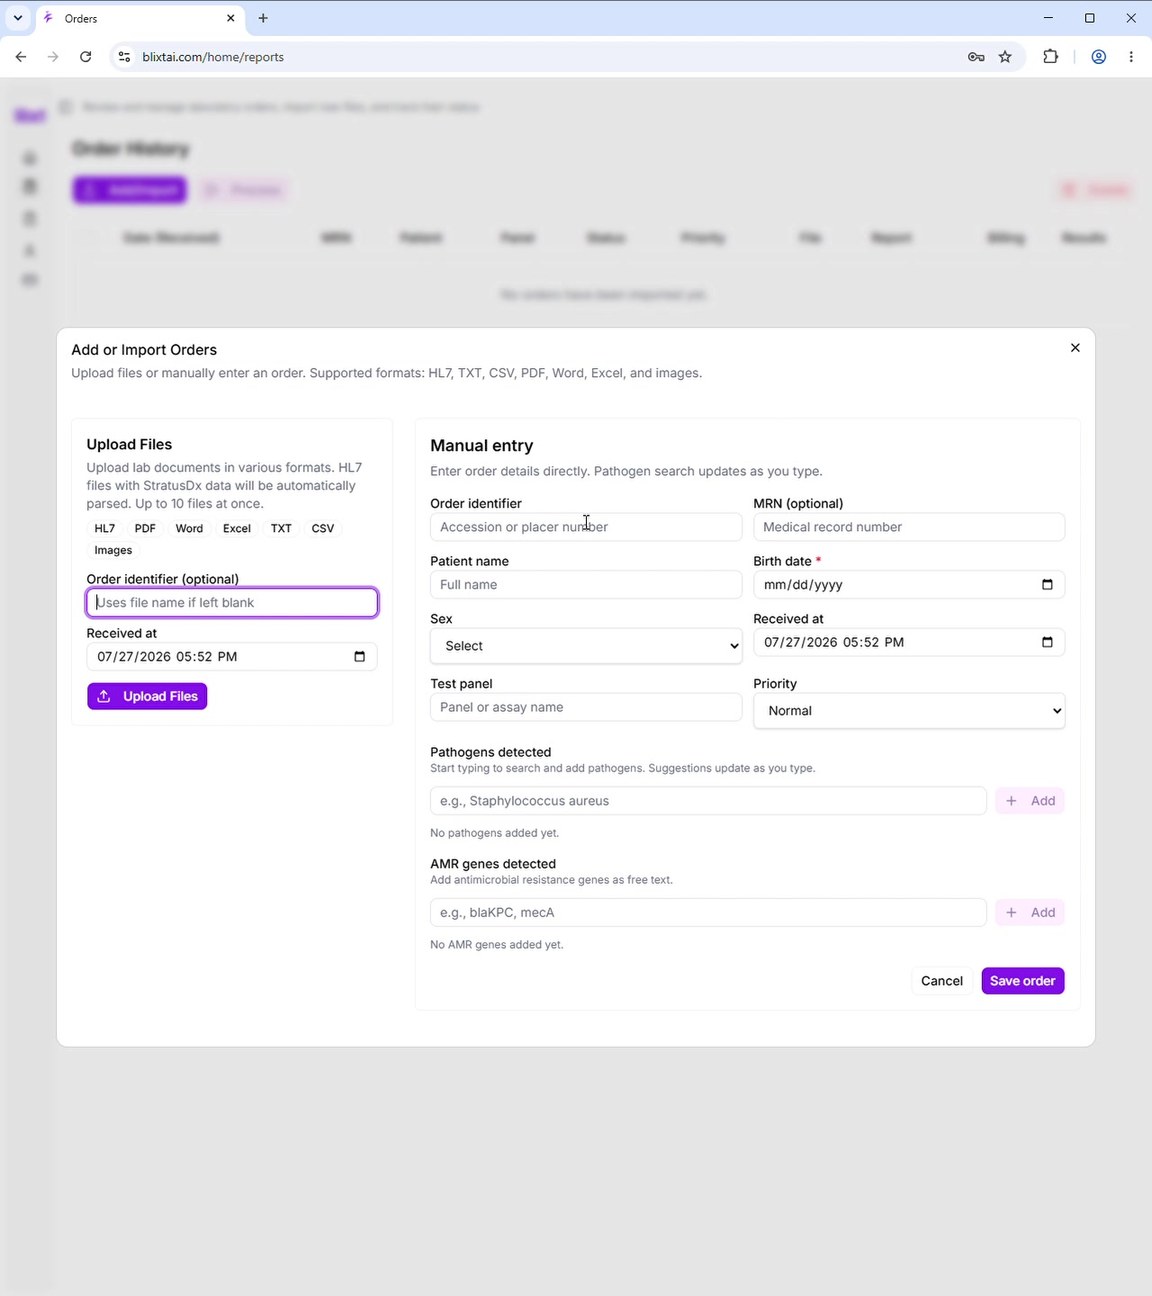
Select Add/Import. The Add or Import Orders dialog opens with two panes: Upload Files on the left, Manual entry on the right. Use the right-hand pane.
3. Enter the order and patient details
Fill in the form. Order identifier, Patient name, Birth date and Test panel are required; the rest are optional.
| Field | What to enter |
|---|---|
| Order identifier | Accession number, placer number, or your own order reference. This is printed on the report as the specimen ID. |
| MRN | The patient's medical record number. Optional. |
| Patient name | The patient's full name. It is split into first and last name on the report. |
| Birth date | Required — a report cannot be generated without it. |
| Sex | Female, Male, Other or Unknown. |
| Received at | When the order was received. Pre-filled with the current date and time; correct it if needed. |
| Test panel | The panel or assay name. |
| Priority | Urgent, High, Normal or Low. Defaults to Normal. |
Before going further, confirm the patient, the order and the panel all belong to the same case.
4. Add the detected pathogens
- Select the Pathogens detected box and start typing the organism name.
- Suggestions appear underneath as you type, from two characters onwards.
- Select the correct organism from the suggestions, or select Add to accept exactly what you typed.
- The organism appears below the box as a removable tag.
The example uses Escherichia coli. Choose the most specific organism the result supports — do not pick a similar organism just because it appears first in the list.
Repeat for every pathogen on the order. To remove one, select the × on its tag.
5. Add the detected AMR genes
Resistance genes are free text, so there are no suggestions here.
- Select the AMR genes detected field.
- Type the marker exactly as the assay reported it.
- Select Add. It appears as a removable tag.
The example uses blaCTX-M-14. Watch for stray spaces and typos — these are printed on the report and drive the treatment analysis.
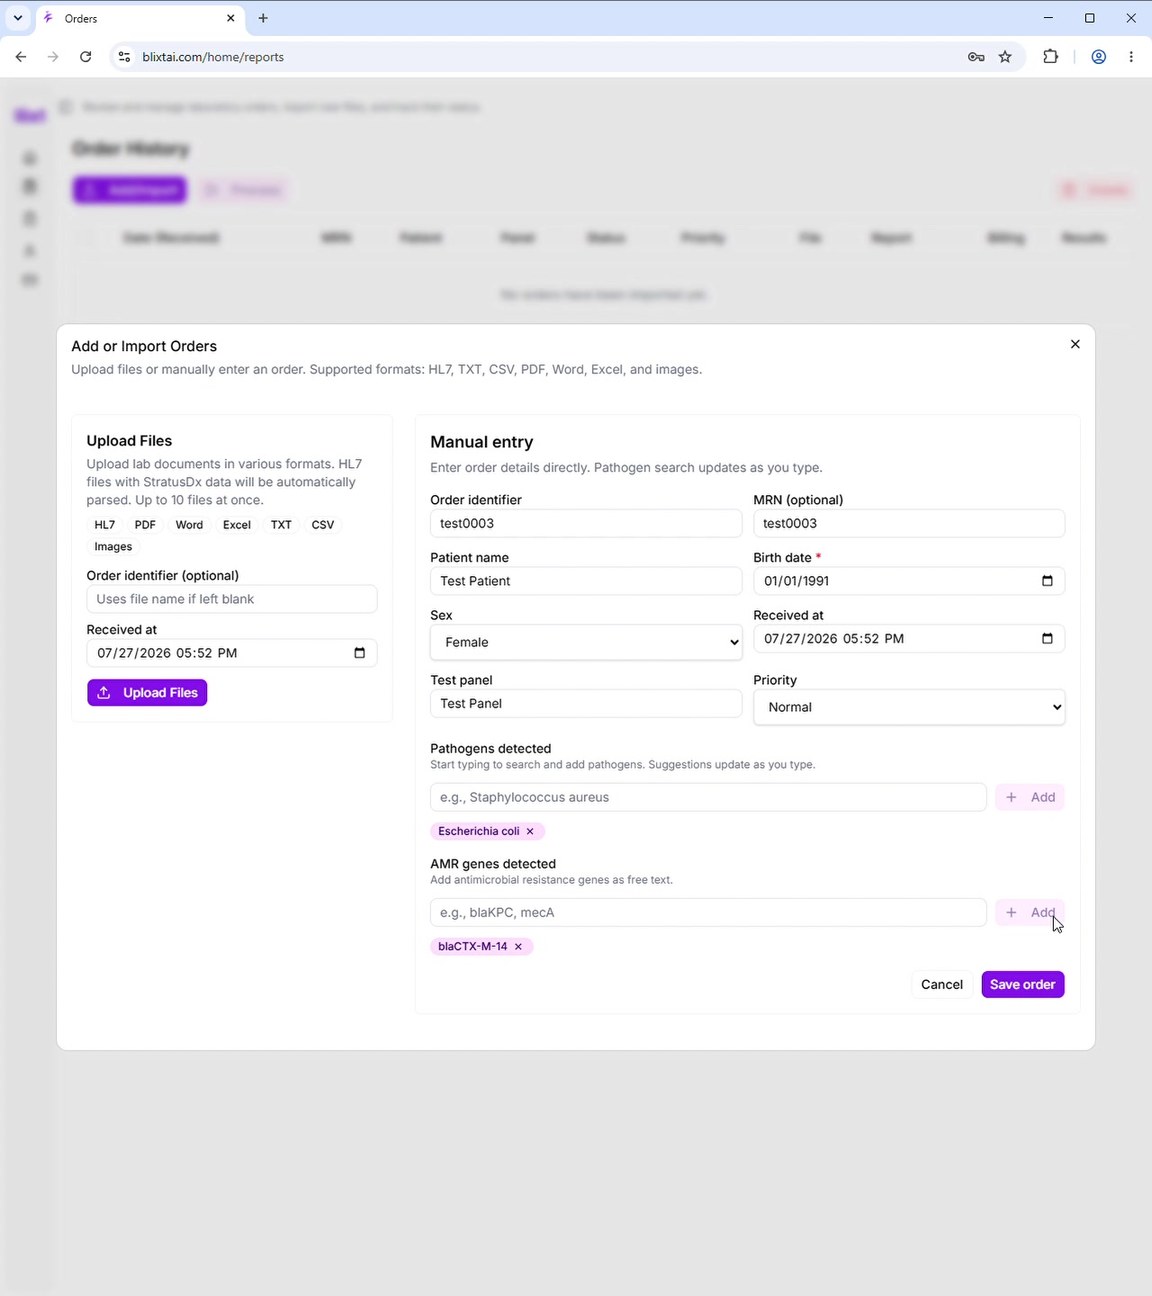
Before saving, check that every intended result is present as a tag, that there are no duplicates, and that the spellings match the source result.
6. Save the order
Select Save order. You will see the confirmation Order saved., the dialog closes, and the order appears in Order History with the status Received.
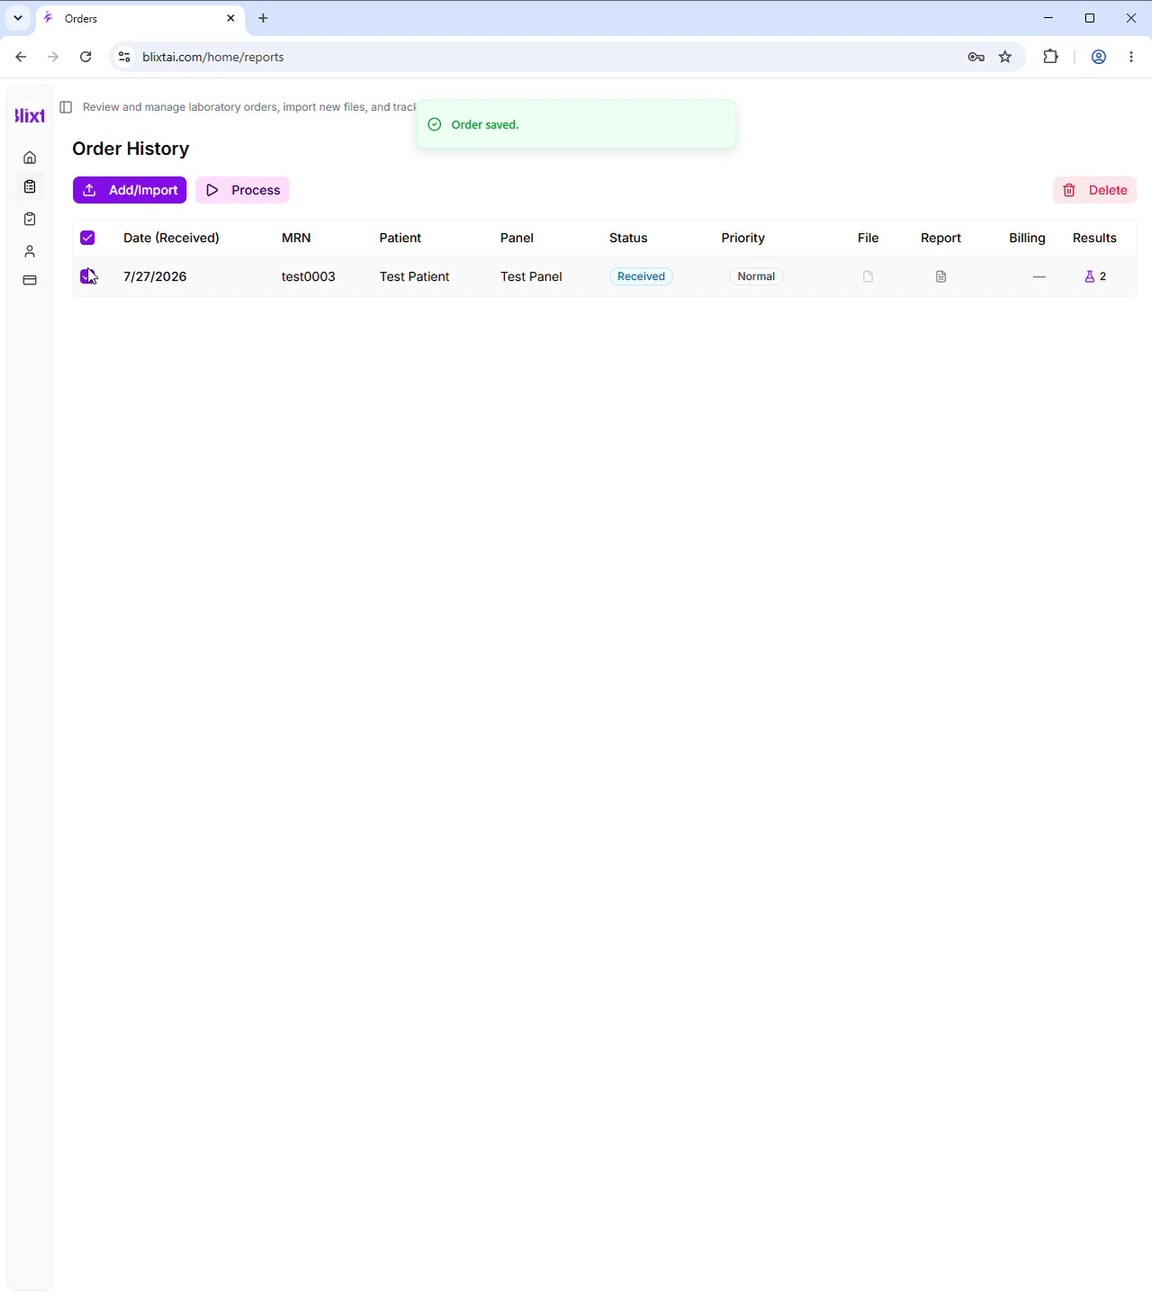
The Results column shows 2 for this order — one pathogen and one resistance gene.
7. Process the order
- Tick the checkbox at the left of the order row.
- Check that only the orders you intend to process are selected.
- Select Process.
The button changes to Processing… and you will see Orders queued for processing.
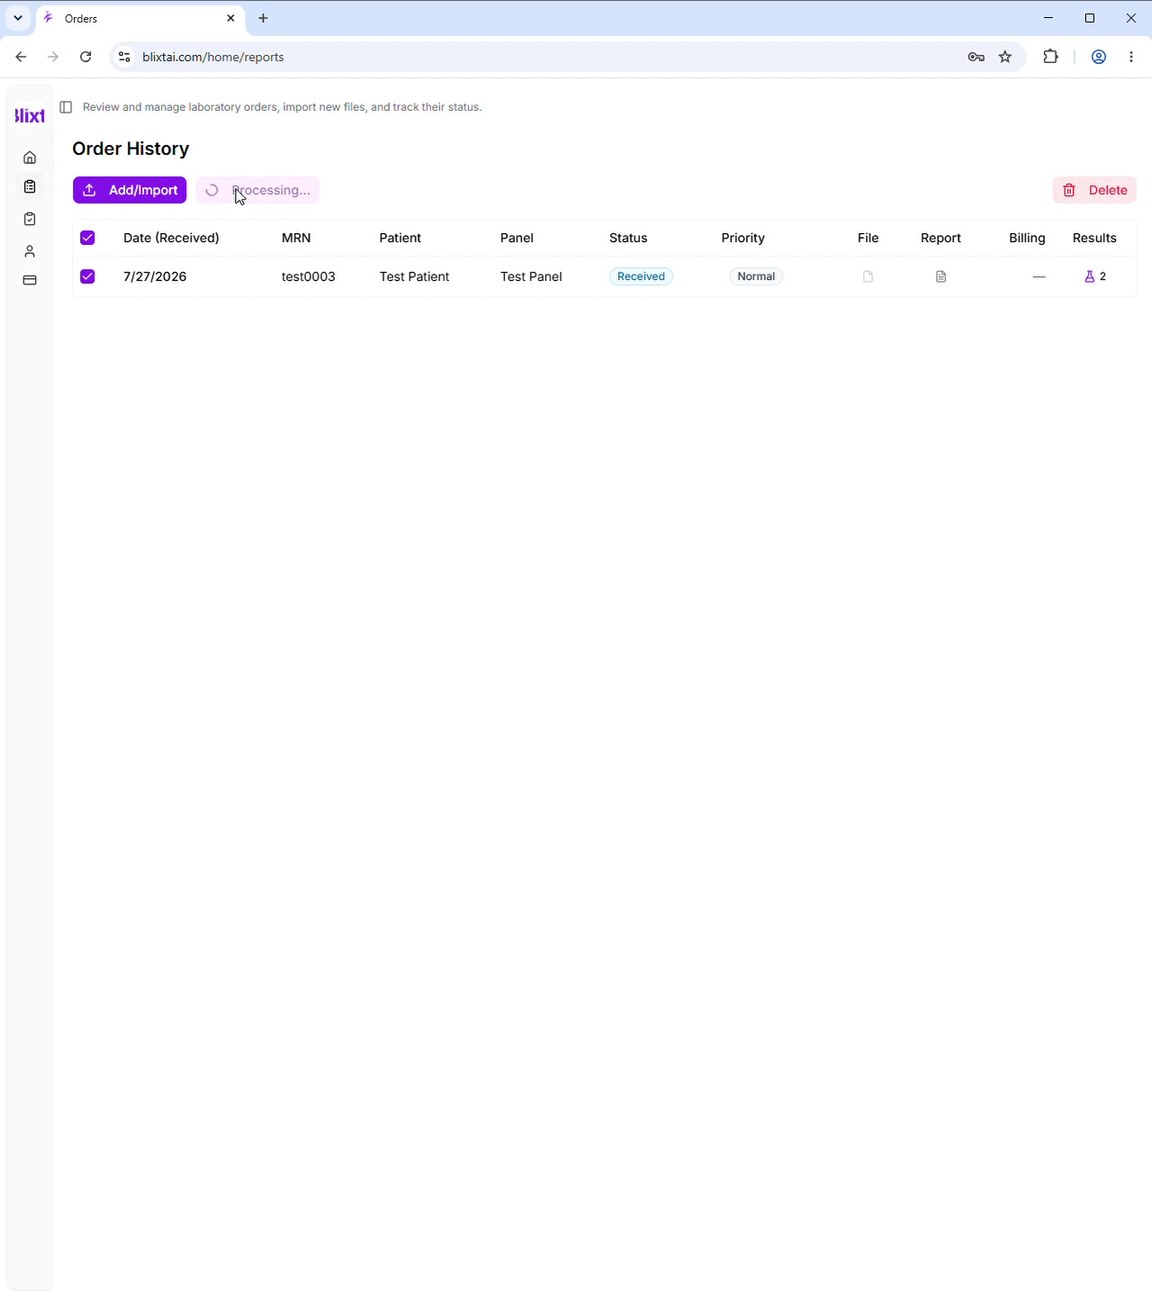
Keep the page open while this runs. In the demonstration it took about 50 seconds; the actual time varies.
8. Confirm it finished
The order is done when the row shows:
- Status of
Processed - an icon in the File column
- an icon in the Report column
- a value in the Billing column, such as
Included
9. Open the report
Select the icon in the Report column. The report opens in a viewer.
Do not confuse the two document columns: File opens the source document the order came from, while Report opens the analysis generated for you.
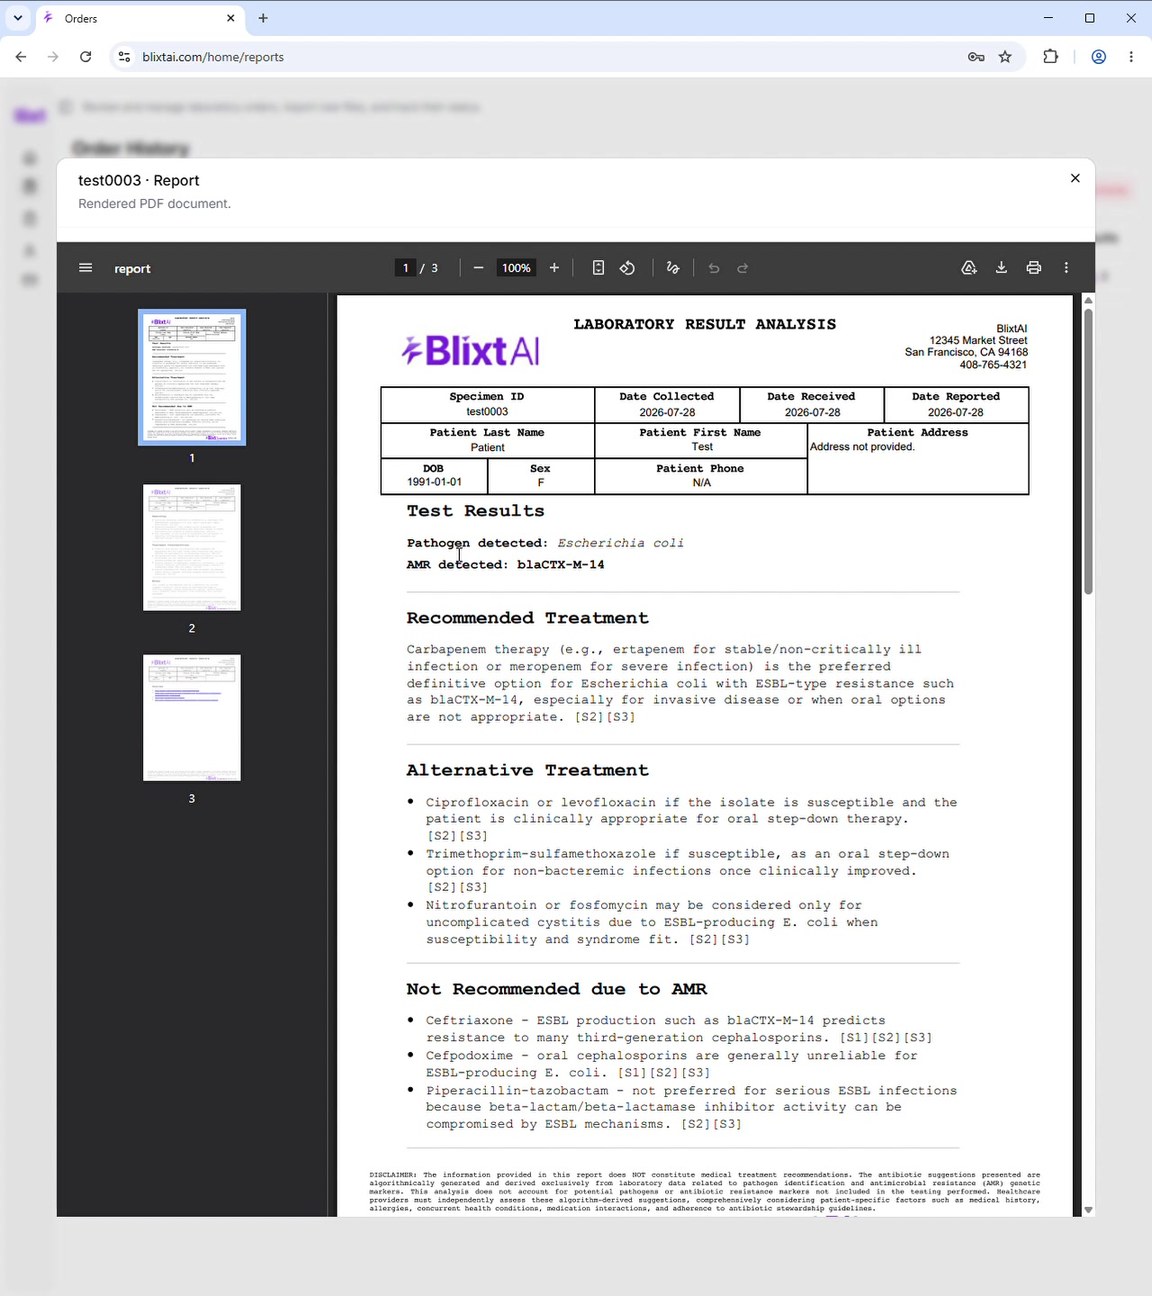
The generated report runs to three pages, and it is worth reading all of them:
Page 1 — the specimen and patient details, Test Results, Recommended Treatment, Alternative Treatment, Not Recommended due to AMR, and a clinical disclaimer.
Page 2 — the supporting reasoning: guideline preference, oral step-down considerations, Treatment Considerations and Notes.
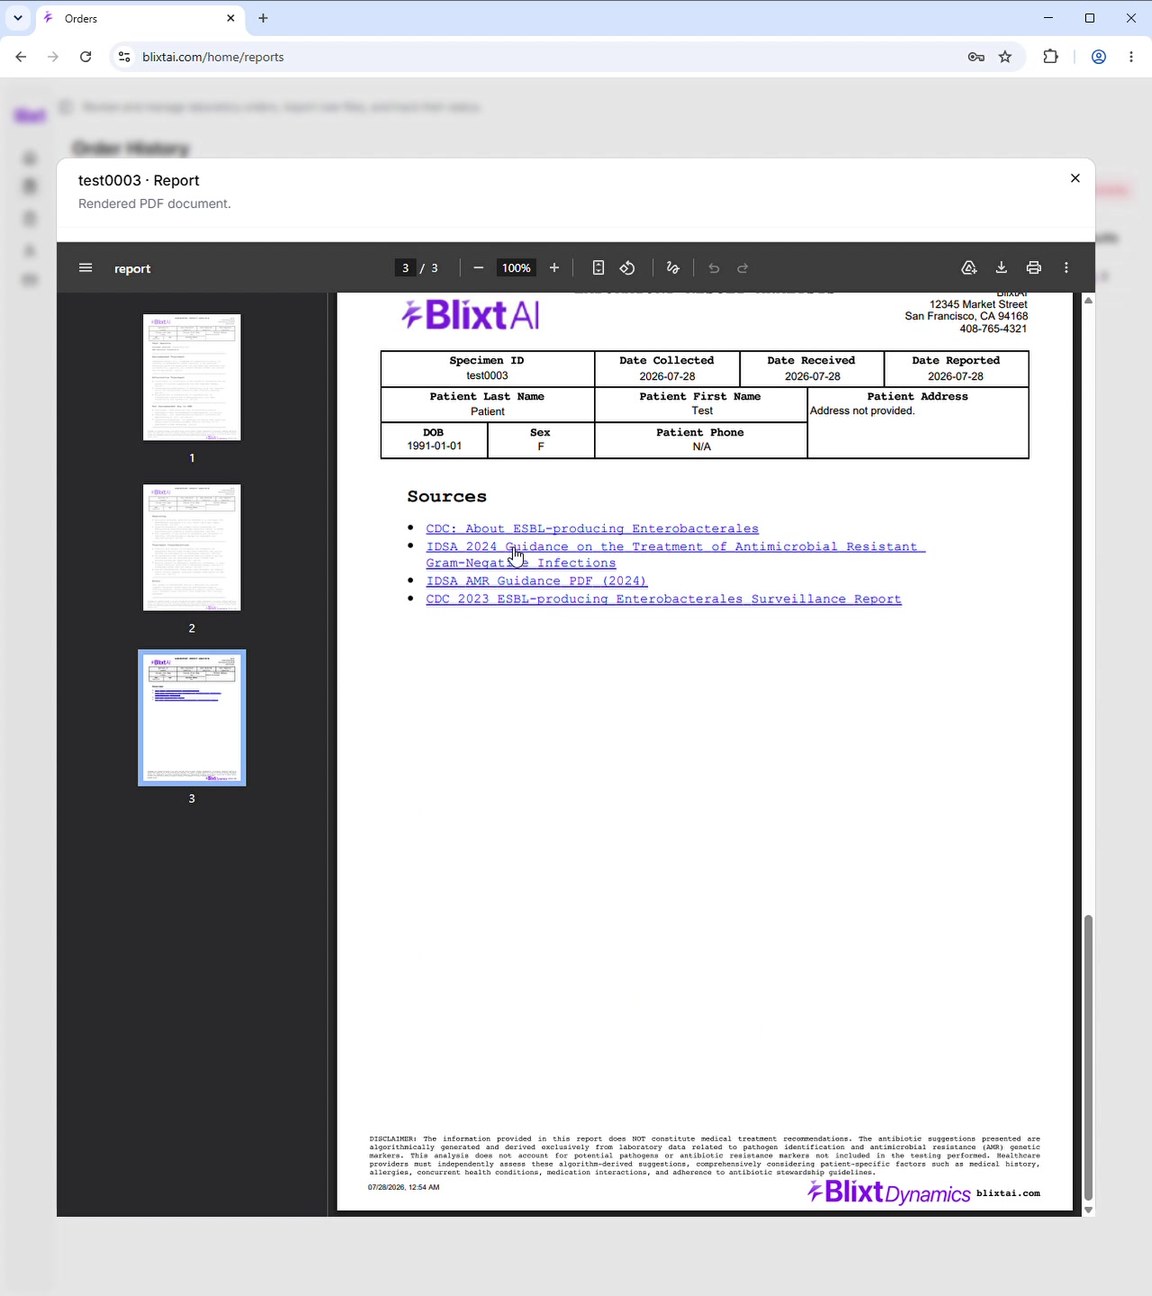
Page 3 — the sources and guideline links the analysis drew on.
10. Download or print
Use the viewer's own PDF toolbar: the download icon saves the file, the print icon prints it, and the page and zoom controls move around the document. There is no separate download button elsewhere on the page.
After downloading, open the saved file and check that every page is there.
Before the report is used
Check each of the following:
- Patient match — name, birth date, MRN and order identifier are correct.
- Dates — received, collected and reported dates are plausible.
- Results match — every pathogen and resistance marker matches the source.
- No extra results — nothing was added to the wrong order.
- Completeness — all pages render and the sources section is present.
- Clinical review — a suitably qualified clinician or pharmacist has reviewed the treatment content, per your organisation's policy.
- Distribution — the PDF is stored or sent only through approved systems.
The treatment content is decision support, not a substitute for clinical judgement. Final therapy should rest on the whole clinical picture: culture and susceptibility results, infection site, severity, allergies, renal and hepatic function, drug interactions, your local antibiogram and formulary, and current institutional guidance.
If something goes wrong
Process is greyed out — tick the checkbox next to the order. Check the order was saved and is not already processing.
A pathogen will not appear as a tag — type at least two characters, select the suggestion, and select Add. Confirm the tag is visible before saving.
An AMR gene will not appear as a tag — enter the full marker name, select Add, and check for stray spaces or a typo.
The Report icon stays disabled — wait for the status to reach Processed. If processing does not complete, or an error appears, contact your administrator.
You saved the wrong information — do not process or distribute the report. Follow your organisation's correction procedure. If you are authorised to, select the order, use Delete, and recreate it correctly. Note that a recreated order is a new order, so generating its report is charged again; if you have not processed the order yet, editing it through the Results cell avoids that.